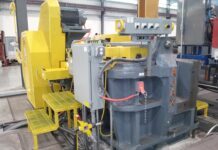
Recreating the bi-axial deformation experienced by steel during stamp forming allows engineering the microstructure of metals by bi-axial deformation tests and analysis
 As the low hanging lightweighting fruits are picked, automotive manufacturers have to now work that bit harder to shed the pounds. BMW is perhaps one of the more progressive examples of a manufacturer driving composite R&D in a major way. However, it is not simply abandoning metal, and like many others, it is seeking out ways to lightweight vehicles using conventional steel.
This has led to BMW Mini initiating a project between The University of Oxford and Diamond Light Source – the UK’s national synchrotron science facility located at the Harwell Science and Innovation Campus in Oxfordshire. The facility harnesses the power of electrons and x-rays to help scientists and engineers gain new insight and understanding in to the microscopic and internal structures of materials. BMW Mini wants answers to a phenomenon that has been witnessed, more broadly, since the 1950s. It is seen when parts are stamp formed, a common automotive process, to make everything from bonnets to doors. The problem is, for any stamping process that is completed in more than one stage, the deformation becomes highly complex, particularly for a pressed part with strain applied in two-axes. This results in a non-homogeneous arrangement of the crystalline and microscopic defect structures.
While it may sound arbitrary, the affect can influence grain morphology, crystal orientation and distribution – all of which have significant impact on mechanical properties, including most importantly, how much the material will stretch before it fractures.
Leading the work is Dr David Collins, a researcher at the University of Oxford, who explains the problem. He says: “They can’t stamp form stronger steels at the moment because of this affect. The metals they use on body panels are actually quite weak, say 10% as strong as the strongest steels on the market. Stronger metals are not ductile and can’t be stamped into the complicated shapes needed.” It means thicker sections have to be used, so panels end up weighing more. It’s something BMW is keen to understand so it can ultimately reduce the weight of steel chassis.
The problem is complex, meaning testing and analysis is far from straightforward. The deformation is biaxial, meaning any obvious traditional solution is not suitable. It led to Dr Collins applying to use the synchrotron to carry out tests and shed new light, or x-rays in this case, on the problem. However, he soon faced another problem, the Shimadzu AGS-X 10kN load frame that was available, was a single axis machine. Dr Collins decided to do what so many engineers have done before him – innovate. He designed a mechanism to generate the bi-axial deformation needed, which also bolts straight on to the Shimadzu machine. “I’ve built a mechanism that uses the power of the load frame to generate the stresses,” he says. “There are four diagonal rods at the corners to change the angle and determine the ratio of how much it is deforming in each direction. I can make it more biased towards the horizontal, vertical or even one side.”
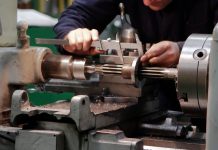
“I spent time in the workshop machining all the components myself. I started from scratch and it was a very steep learning curve. I broke a lot of tools and upset a couple of people, but I was very determined to make the mechanism and run the tests.”
The request to use the synchrotron was successful and four days of testing commenced. The results show a series of concentric rings, with each ring corresponding to a signal coming from individual lattice planes. The shape of these rings, and their radius, gives an important microscopic insight. “If you deform a bit of material, those rings change in diameter,” he says. “And you can then measure how much strain is being taken up by individual planes. So you capture what is happening on the atomic planar level.” The cross shaped specimen is 1mm thick, but in the centre this is reduced to just 300µm. If it was a uniform thickness, the test would simply pull the arms off. A cross is machined in the middle, which steps down to a thinner circular cross section just 300µm thick.
“One thing you can see is how strain is being accommodated in the individual grains based on their orientations,” says Dr Collins. “You can monitor the centre on a macroscopic level by putting a camera in front of the rig. But with x-rays, they tell you what the strain is, on all of the individual crystals.” With the tests complete, the hard work begins. After four intense days of gathering data, it could be a year or more of analysis to find conclusive explanation of the bi-axial deformation phenomenon.
What is known is that ‘material texture’, ie the orientation of grains in the material, has a big effect on the ductility of the materials and how strain is accumulated. As all sheet materials are rolled during production, it forces most of the crystals to align in one orientation.
“We can tell BMW things like ‘texture is important’, but we don’t yet know how to optimise it,” says Dr Collins. “Eventually, however, we hope to get enough of an idea about the affect to apply it to different materials. We’re sticking with steel for the moment as we don’t want to end up blurring the problem with other complexities. But, there is no reason why this research could not be limited to any alloy. For a lot of metals, no one has proved if this phenomenon even exists or not, so there might be massive benefits with lots of different applications outside the automotive world.”


